
If you use Picasso for overnight stays and tickets, the Picasso integration sends your guests and their bookings to Heyloyalty. You can then write to each guest based on what they actually booked, and you know who said yes to your newsletter.
In this guide, you can read how the integration works and what needs to be in place in Heyloyalty before Picasso can connect the integration.
What value does the Picasso integration provide?
Match your emails to the booking
Every booking comes into the tracking with the booking date, the type and the number of guests. The booking date separates guests who plan well ahead from those who decide at the last minute. A guest who booked two months ago needs a different email from one who booked yesterday.
Find the next purchase for each guest
You can see which ticket or pass the guest bought, and whether they bought any add-ons. Use it to find the next relevant purchase, for example from a single visit to a pass that covers the whole season.
See which campaign codes guests use
The campaign code comes with the booking. You can see which campaigns your guests have used, and write to those who booked with a specific code.
Separate newsletters from service emails
Picasso sends the guest’s newsletter consent, also when the answer is no. Guests who said yes can get your newsletters. The others can get service emails about their booking, and you can tell them about the newsletter in the flow after the purchase.
Integration specifications
The integration is built and maintained by Picasso. Before Picasso can connect it, your list needs a tracking integration with Picasso’s tracking fields and the list field newsletter, and you need to have decided who gets newsletters. You do this in steps 1–4 below, together with the Heyloyalty team.
Once the integration runs:
- Picasso sends your guests to your Heyloyalty list and their bookings to the list’s tracking.
- When a guest buys, Heyloyalty is up to date within minutes.
- The guest’s newsletter consent comes into the list field
newsletter, also when the answer is no. - Past purchases can be imported when the integration is launched.
- Your order confirmations and transactional emails carry on as they are. Heyloyalty handles the communication around the purchase.
- Scanning of tickets, passes and camp arrivals at the entrance is not part of the integration.
Step 1: Create a tracking integration on the list
Picasso sends the bookings to the tracking on the list your guests should be on. The list therefore needs a tracking integration before you can create the tracking fields in step 2. If you don’t have a list for your guests, you can read how to create one.
If the list doesn’t have a tracking integration, go to Integrations → List integrations, find Tracking, and click Setup integration (or Edit integration if you already have a tracking integration on another list). Then click Create new Tracking. Read how to fill in the settings in Tracking – the experience industry.
Step 2: Create the tracking fields
Booking data from Picasso lands in a set of tracking fields that you create on the list’s tracking. Go to Integrations → List integrations, and click Edit integration next to Tracking. You get to the page Tracking overview. Click the three dots in the top right corner, and choose Add custom fields.
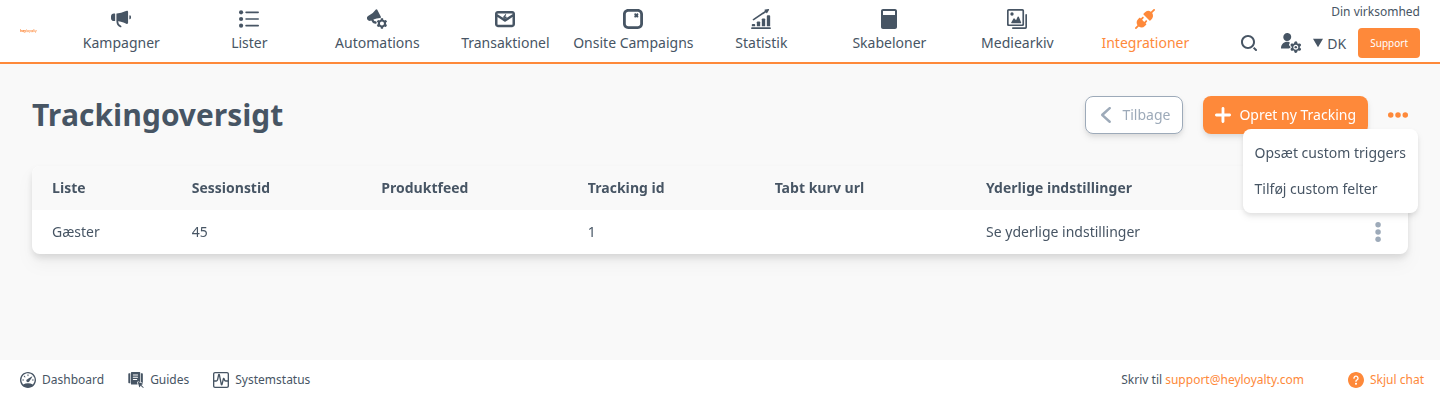
You get to a second page called Tracking overview, which lists the lists that already have custom fields in the tracking. Click Trackinglists with custom fields in the top right corner. If your list is already in the overview, click the three dots next to the list instead, and choose Edit fields.
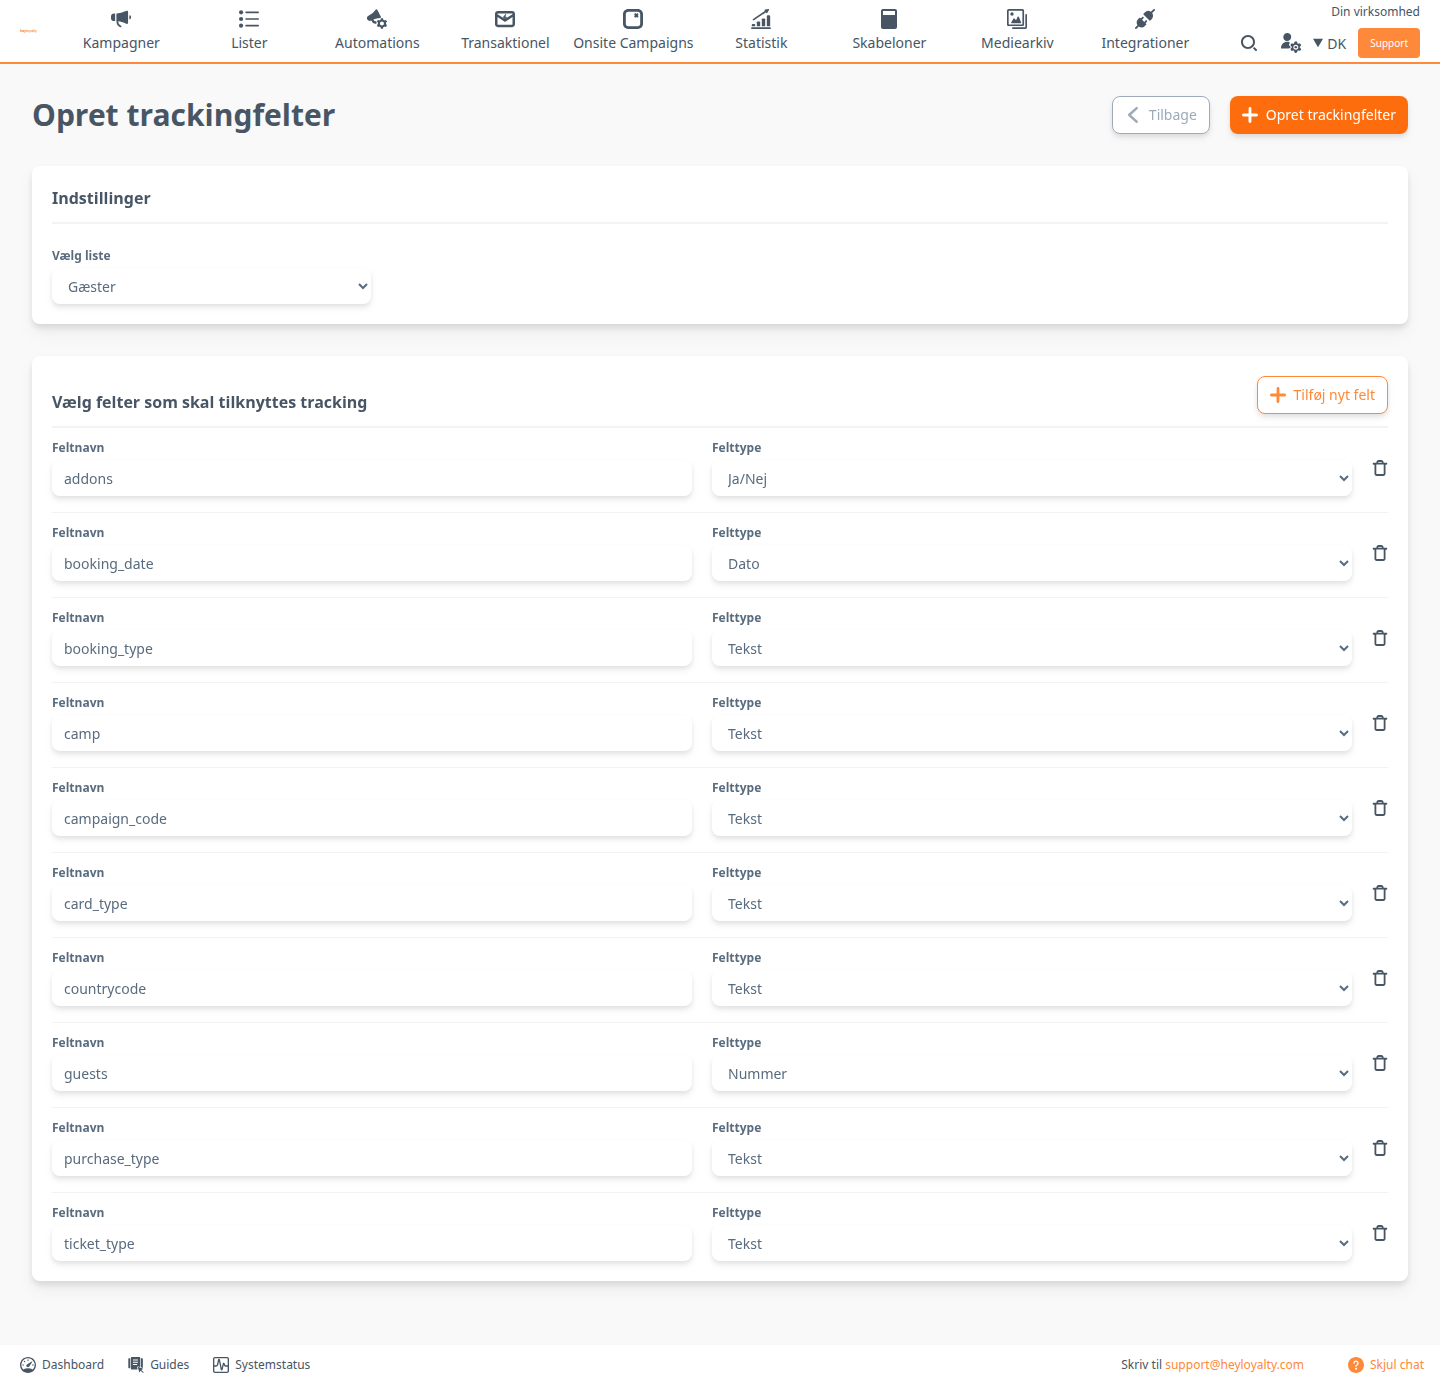
Select your list under Choose a list. Then click Add new field for each field in the table below, and fill in Field name and Field type. Spell the field names exactly as in the table, or they won’t match what Picasso sends.
| Field name | Field type |
|---|---|
addons | Yes/No |
booking_date | Date |
booking_type | Text |
camp | Text |
campaign_code | Text |
card_type | Text |
countrycode | Text |
guests | Number |
purchase_type | Text |
ticket_type | Text |
Click Create tracking fields in the top right corner to save the fields. If you are editing a list that already had fields, the button is called Update tracking fields.
Step 3: Create the list field newsletter
Picasso sends the guest’s newsletter consent in the list field newsletter. Go to Lists, click the three dots next to your list, and choose Edit list. Under Adding fields and groups, click Create new field and fill in the field:
- Field name: Enter
newsletter. - Type: Choose Yes/No.
- Merge field: Filled in automatically with
newsletter. Check that it says exactly that.

Click Save at the bottom of the page.
Step 4: Set up permissions
Guests from Picasso come onto the list whether they said yes or no to the newsletter. The field newsletter shows who said yes, so that is what you base your sends on. The setup depends on whether you want to send 10_2 emails. These are emails under section 10(2) of the Danish Marketing Practices Act, where you market your own similar products to guests who have bought from you.
- No 10_2 emails: Only send newsletters to a segment where
newsletteris Yes. Guests wherenewsletteris No only get service emails, for example practical information about their booking. - 10_2 emails: Set up the same, and also create a segment where
newsletteris No for your 10_2 sends.
Other signup sources
All other sources that create contacts with consent on the list must also set newsletter to Yes, for example signup forms, Onsite Campaigns and Meta. Otherwise, those contacts are left out of your newsletter segment.
Update form
Consider an update form in the footer of your website, so guests can change their subscription themselves. Whether it makes sense depends on how you handle permissions otherwise. Read how to make an update form on the website.
Step 5: Let Picasso know
Once the tracking integration, the tracking fields and the field newsletter are in place, Heyloyalty is ready. Let Picasso know, so they can connect the integration.
Step 6: Test tracking across domains
Your guests book in Picasso, but they also visit your own website. For Heyloyalty to link what the guest does on your website with the booking, the tracking has to follow the guest from your website into Picasso:
- Ask Picasso to add the Heyloyalty tracking script to Picasso’s Google Tag Manager plugin.
- Make sure that cookie and session IDs are passed on from your website to Picasso. Your web agency can help with this.
- Test that the tracking works.
The tracking script also needs to be on your own website. Read more in Tracking – the experience industry.
Make active use of your Picasso data
You have now made Heyloyalty ready for Picasso: The list has a tracking integration with Picasso’s tracking fields, the field newsletter is created, and you have decided who gets newsletters. Once Picasso has connected the integration, your guests and their bookings are in one place in Heyloyalty.
That lets you answer questions such as: Who booked at the last minute, and who planned well ahead? Who bought a single visit and could use a pass for the whole season? Who booked with this year’s campaign code? Build the answers as segments and flows on the bookings in the tracking, and send newsletters to a segment where newsletter is Yes. Read how to segment on bookings in Tracking Segmentation.